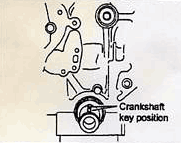
 | 1) Confirm that No. 1 piston is set at T.D.C. on it's compression stroke. |
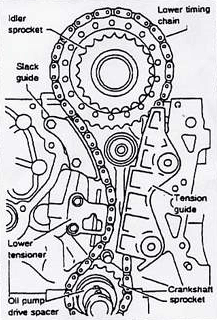
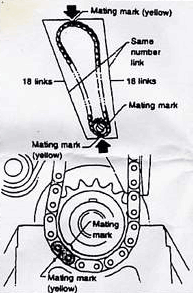 | 2) Install lower timing chain. - Set timing chain by aligning its
- crankshaft sprocket and the one on the idler sprocket. The Dumber of links between the alignment marks (yellow) are the same for the left and right sides, alignment with the sprocket.
|
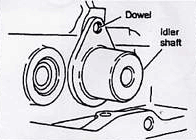 | 3) Fit idler sprocket and bolt to cylinder head. - Ensure the idler shaft is located correctly, as shown.
4) Fit chain guide 5) Fit lower chain tensioner. |
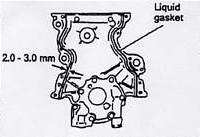 | 6) Apply liquid gasket 10 front cover. |
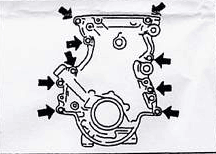
 | 7) Install front covet. - Align oil pump drive spacer with oil pump.
- Ensure O-rings are fitted correctly
- Be careful not to damage oil seal when installing front cover.
8) Fit oil strainer. 9) Before installing oil pan, remove all traces of liquid gasket from mating surfaces using scraper. |
 | 10) Fit new seals as shown. Ensure correct length front and rear. - Length "l":
- front seal - 134 mm (5.28 in)
- rear seal - 123 mm (4.84 in)
|
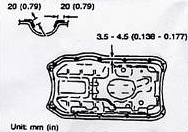 | 11) Apply a continuous bead of liquid gasket to mating surfaces of oil pan as shown. - Attaching should be done within 5 minutes after applying liquid gasket.
|
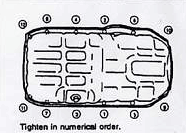 | 12) Install oil pan. (Tighten bolts in sequence as shown) 13) Install crankshaft pulley. 14) Install center cross member. 16) Install front and right side splash guards. |
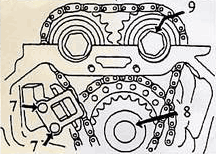
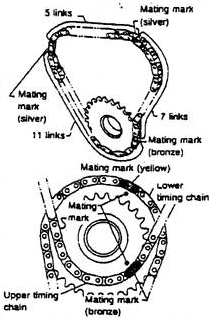 | 17) Install upper timing chain and set it by aligning the mating mark on the smaller idler sprocket with the bronze mating marks on the upper timing chain. - Set timing chain by aligning mating marks with those of camshaft sprockets.
18) Assemble exhaust camshaft sprocket with timing chain. 19) Install camshaft sprocket bolt. - Make sure camshafts are aligned as shown.
|
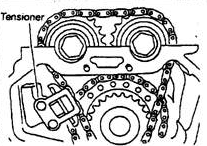 | 20) Inslall top tensioner. |
 | 21) Install front blind plate. |
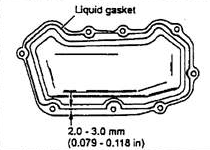
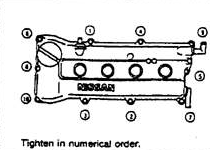 | 22) Gean rocker cover, ensure it is free from grease. - Fit the gasket & cover within 5 minutes of applying the liquid gasket.
23) Fit the rocker cover to the cylinder head. 24) Tighten the bolts in the correct order as shown. 25) Install front engine bracket & mounting. 26) Install and correctly tension the alternator and power steering drive belts. |